.post-body {font-family: Courier, monospace;}

Monday, February 24, 2014

Windows

I forgot that I had had taken pictures of my favorite windows in New York City.  We were there for the day January 4 and we went by Bergdorf Goodman on Fifth Avenue.  This store always has the most artistic and dream-like windows during the holidays.  My photos were taken and the day was sunny, so there's loads of glare.  Please take a look at the official site and their pictures:

http://blog.bergdorfgoodman.com/windows/holiday-windows-2013-holidays-on-ice#ad-image-0

Nothing compares!


Saturday, February 22, 2014

A blast from the past

I sorted through my card collection last night and found a card by my friend Brenda. I LOVE this card!!  Now I want to play with the technique Brenda used to make this card.  She made these beautiful papers, using metallic paints. She used them for a project, and as she so often cleverly does, wanted to use up her scrap papers.  So she featured these gorgeous scraps by cutting wavy lines in the card and weaving the papers through.  Then securing the ends. BEAUTIFUL!!

It's been ages since I made something with this technique, but I sure do want to try it again. I think I should collect some of my Gelli plate papers, and cut some strips and start there.
Anyway, here's her card:


Wednesday, February 19, 2014

Tan Tiles Zentangle

I had a Beyond Basics class last night with my local CZT Katy.  She introduced us to tan tiles and we used Sepia colored pens.  The great thing about this is that it really makes for some interesting designs with the use of black, sepia and white pens, on the tan colored tiles.  This is one that is in progress, that I started last night.  

The patterns are Fangs, Chainging with some Punzel, and YinCut.  

Hope to have more to show later!!


Tuesday, February 18, 2014

Guitar cards

So these are the cards I made for Ryan and Brandon. Got the idea from a catalog. I had fun making them and love how they turned out. My pal at work offered to pay me to make some for her. At least I know what card to make for her birthday.  


Friday, February 14, 2014

Happy Valentine's Day

So Thursday was a snow day.  After an hour of back straining, arm twisting, shoulder stressing work shoveling I came in, got myself cleaned up, and spent a load of time in my studio creating.  I made coffee paper, as promised.  More on this in another post.

I thought I'd start to do the big reveal on the Valentine's Day cards.  I made a small number for friends and family, and I'm quite pleased with how it turned out.  


Meanwhile, I had to work on the big card for the occasion, for Dan.  I found some inspiration, as usual, on Pinterest and just went crazy.  I am a big fan of the Gypsy, a tool that allows you to create and design layouts for the Cricut die-cut machine.  I could select, re-size and reproduce hearts of varying sizes.  Then I can mirror-image them, to allow them to be attached on both sides, at the top of the card.  Since many are not symmetrical, this was really valuable.  So the card is 12 inches wide, scored at the 4" mark.  I cut the card at an angle, so that it steps up.  Along the top edge I attached pairs of hearts, placing them to allow the card to fold nicely.  I used some of the decorative papers posted previously, and some that were embossed with the Cuttlebug.  I stamped in black and white to vary the colors and patterns.


Then I still had loads of heart stickers left, so I added some along the bottom edge of the card.  I truly enjoyed designing and making the cards.  

Happy Valentine's Day everyone!!

Wednesday, February 12, 2014

Sharing the art

I thought I'd share a picture from my dear, dear, amazing friend Jo-Ellen who created this collage work, inspired by the same CJS videos I've been raving about.  She sent me this picture, and it might be tough to see.  


It's a sign she made and hopefully you can read it.  She has the rules for her studio, which all begin with the word "allow."  I really love this!

Tuesday, February 11, 2014

coffee papers

So in the not so recent past I created some amazing papers using coffee. Specifically, I took instant coffee (such as Folgers that was flavored and smelled delicious) and mixed some with a bit of water.  You then drip, pour and dribble the liquid over the paper.  Then you take some of the instant coffee powder and sprinkle it over the wet paper. Finally, take some gold pigment powder and sprinkle it on the wet paper. Allow the papers to dry, or use a heat gun to dry them quickly.  The benefit of this approach is that the water will move around on the paper if you use a heat gun.

The result is delicious looking, and smelling, papers.  I found some of this paper recently and I am going to play with this technique and make some more of these papers.  Be sure you use a non-coated paper for this technique.  

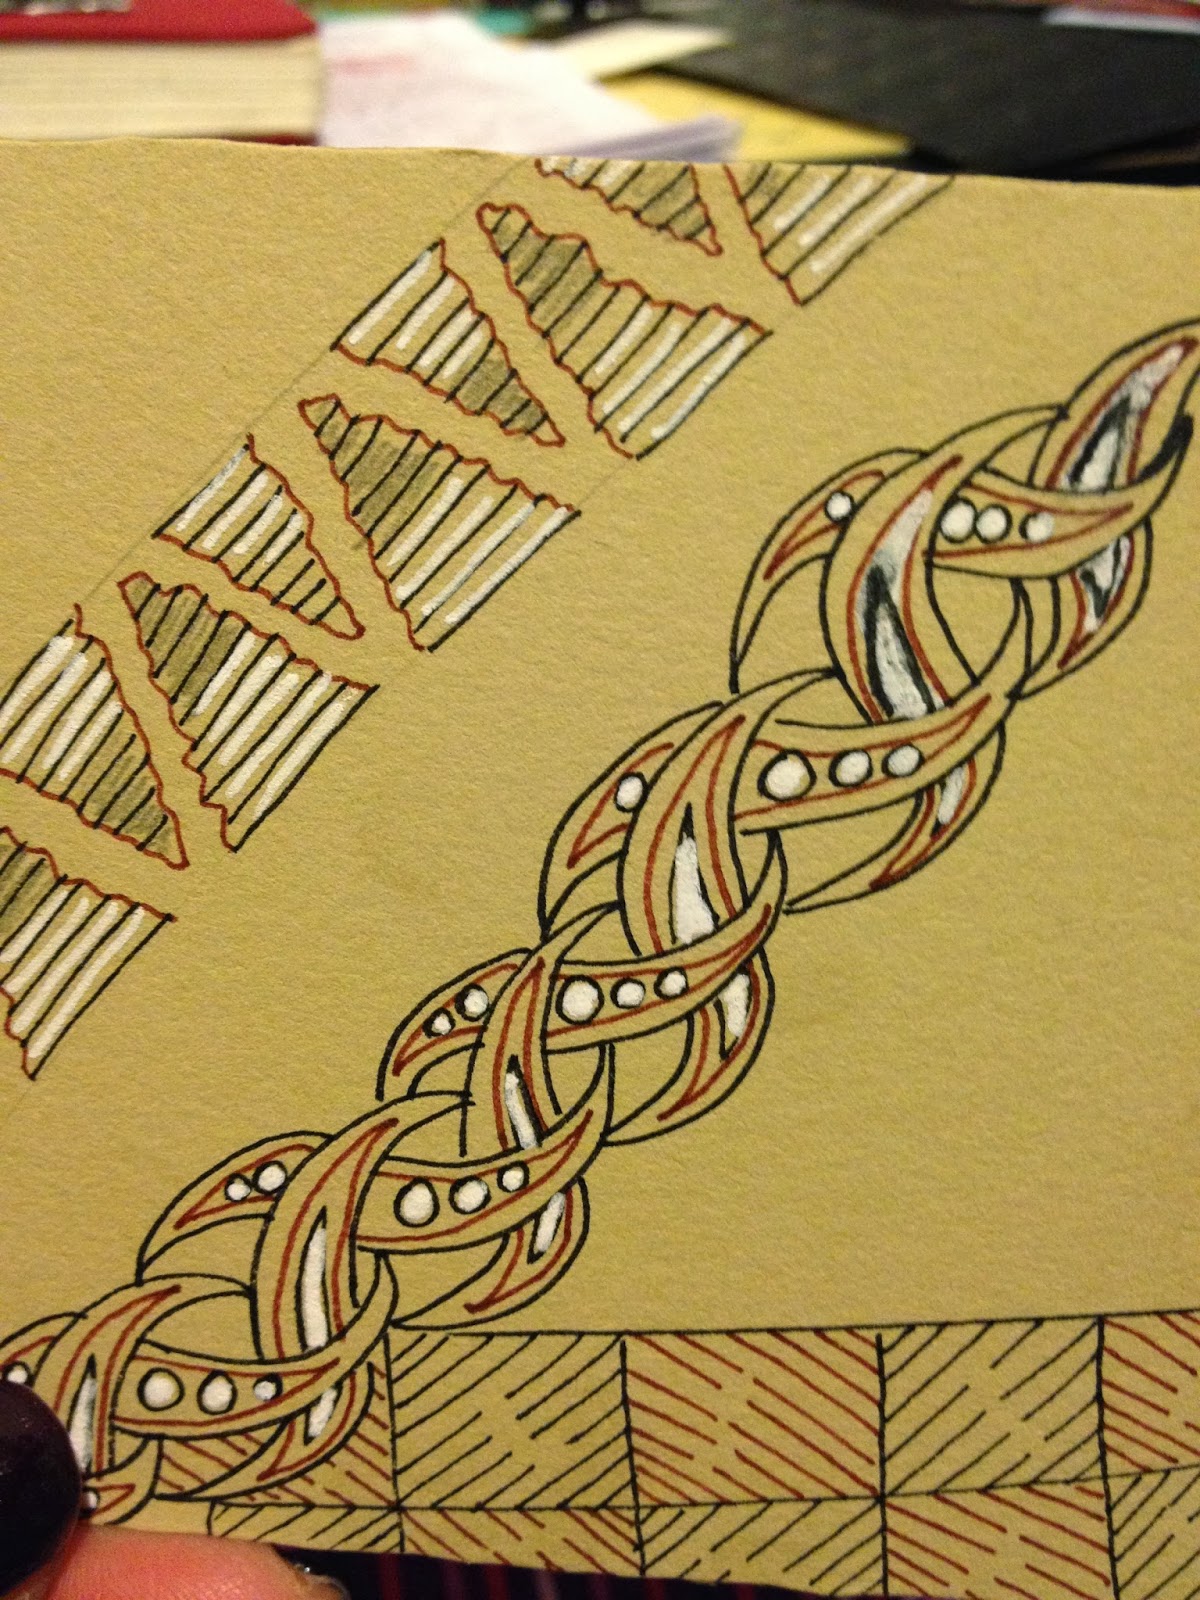
Here's a picture of the sample.


Valentine's Day is coming . . .

I will have to wait to post my Valentine's Day card, don't want the reveal to come too early! Meanwhile, I can show some of the fun papers I created using my Gelli plate. I love how these turned out. Again, paints and household objects with the Gelli plate.


Appropriate that I LOVE these papers! I had to remount the stamp I used. Notice the stamped images aren't great. I pulled and cleaned the rubber and used some Quick-E-Mount. Now it's much better!  Maybe I will do show and tell later!

Monday, February 10, 2014

What about all those background papers?

Well, after playing with the gelli plate you are probably wondering what to do with the papers! I signed up for an online class for journaling called Journal52. As with most things, my eyes are bigger than my stomach and I don't have enough time to keep up with it. The class involves prompts and weekly tasks. This is reasonable, but I am in catch-up mode. So, at this stage all I have is the binder and some  background pages,  using the newly created gelli papers as my journal pages.

I also followed the first assignment and prepared a binder for the pages. I took this hideous 1982 microwave cookbook and converted it into my binder. Love duct tape.  Anyway, here it is and I am ready to dig in. I think I have about 5 weeks to catch up. 


In case you want to check it out, I will post a link. Sadly, I haven't figured out how to do this on the mobile version.  Still haven't figured it out, but I went to the full blown version to edit this post!

Here is the link:


The finished product

So after playing with the gelli plate to make the background, and the stencils, here is my finished work. I love this color yellow, it's like honey. I love bees, so I had to make this in honor of these little magicians. 


Stencils for all!

Apologies for being absent. Creative work goes on and I hope to catch you up.  I am really inspired to create art with stencils after watching the Creative Jumpstart 2014 videos. Several artists demonstrated how to create amazing works with household items and they further embellished the journal pages with stencils. They used stipple brushes with ink, as well as sponges with paint. 

After watching these videos I realized that I could create my own stencils using my Cricut die cut machine. I also have a Gypsy which allows you to creat designs using the images from the cartridges you own and to manipulate these images. For example you can take a heart design and rotate one next to another in order to fit more on a piece of paper. You can link letters to form single words, you can stretch images and break the aspect ratio for your needs. It's great. So I created a "punchinella" style design, along with numbers and some fun images from a new cartridge Lace 2. 

Here is a picture. 


I purchased the material for the stencils from an art supply store. These are the heavy sheets. I had to set the Cricut on multi-cut and then the Gypsy prompts for the number of times it will cut each image. After burning through a sheet where I could not punch out the images easily, I set it for 4 times. That worked perfectly.