.post-body {font-family: Courier, monospace;}

Wednesday, September 24, 2014

Gorgeous card from Brenda

Got another amazing card in the mail from Brenda. I want to show it off because the design is striking.  The gray background coordinates perfectly and the bright colors work so well together.  

It might be hard to see but she also added a bit of dimension with the addition of our favorite, Diamond Glaze, to select spots on the card.  The first question I had is who made these adorable stamps? They are Invoke Arts stamps.  I have some I purchased ages ago and I love the designs they offer.  Since I no longer live near a stamp store, guess I'm missing some really good stuff.

Here's the link to the site:


I want to frame this card!!

Tuesday, September 23, 2014

Dina classes hosted by The Ink Pad NYC at Westbeth Center


Lucky me! I recently attended classes by Dina Wakley, hosted by The Ink Pad NYC. They were held at the Westbeth Center Community room and it was a bright and open location for the class.  

First thing is that even though I was hugely excited about these classes, I almost didn't make it.  I had a seriously ailing back, and I actually had to really work my way up to attending. Armed with loads of ibuprofen, back warmers and loads of determination I drove in for the class. I found parking a block away and had my rolling suitcase loaded with supplies. Thanks to my dear pal Brenda, I never had to lift anything. She really was a lifesaver. She's such a girl scout, she's always prepared. I hope she's in all my classes forever. She made her own journal to create in, and cleverly stamped images instead of trying to pack dozens of stamps. The girl is a genius.

Our first class was Layering and Listening. Brenda and I found seats near the front and ended up sparking a friendship with Lisa Mita who is an amazing artist.  Here's a link to her Facebook page. 


We laughed a lot and Lisa really got me to break out of my clean-freak mode (more on that later)! We also met Laurie, who we learned to love even though she was such a space hog (LOL).  

We were armed with a large piece of watercolor paper and we had to create 25 layers! Each different color was a layer, using a stencil was another layer, etc. It was a challenge to keep track after about a dozen or so. We were learning what our layer quotient was, or how many we liked to have as a background. It was a great exercise. Learning the basics of composing a journal page was SO helpful to me. 

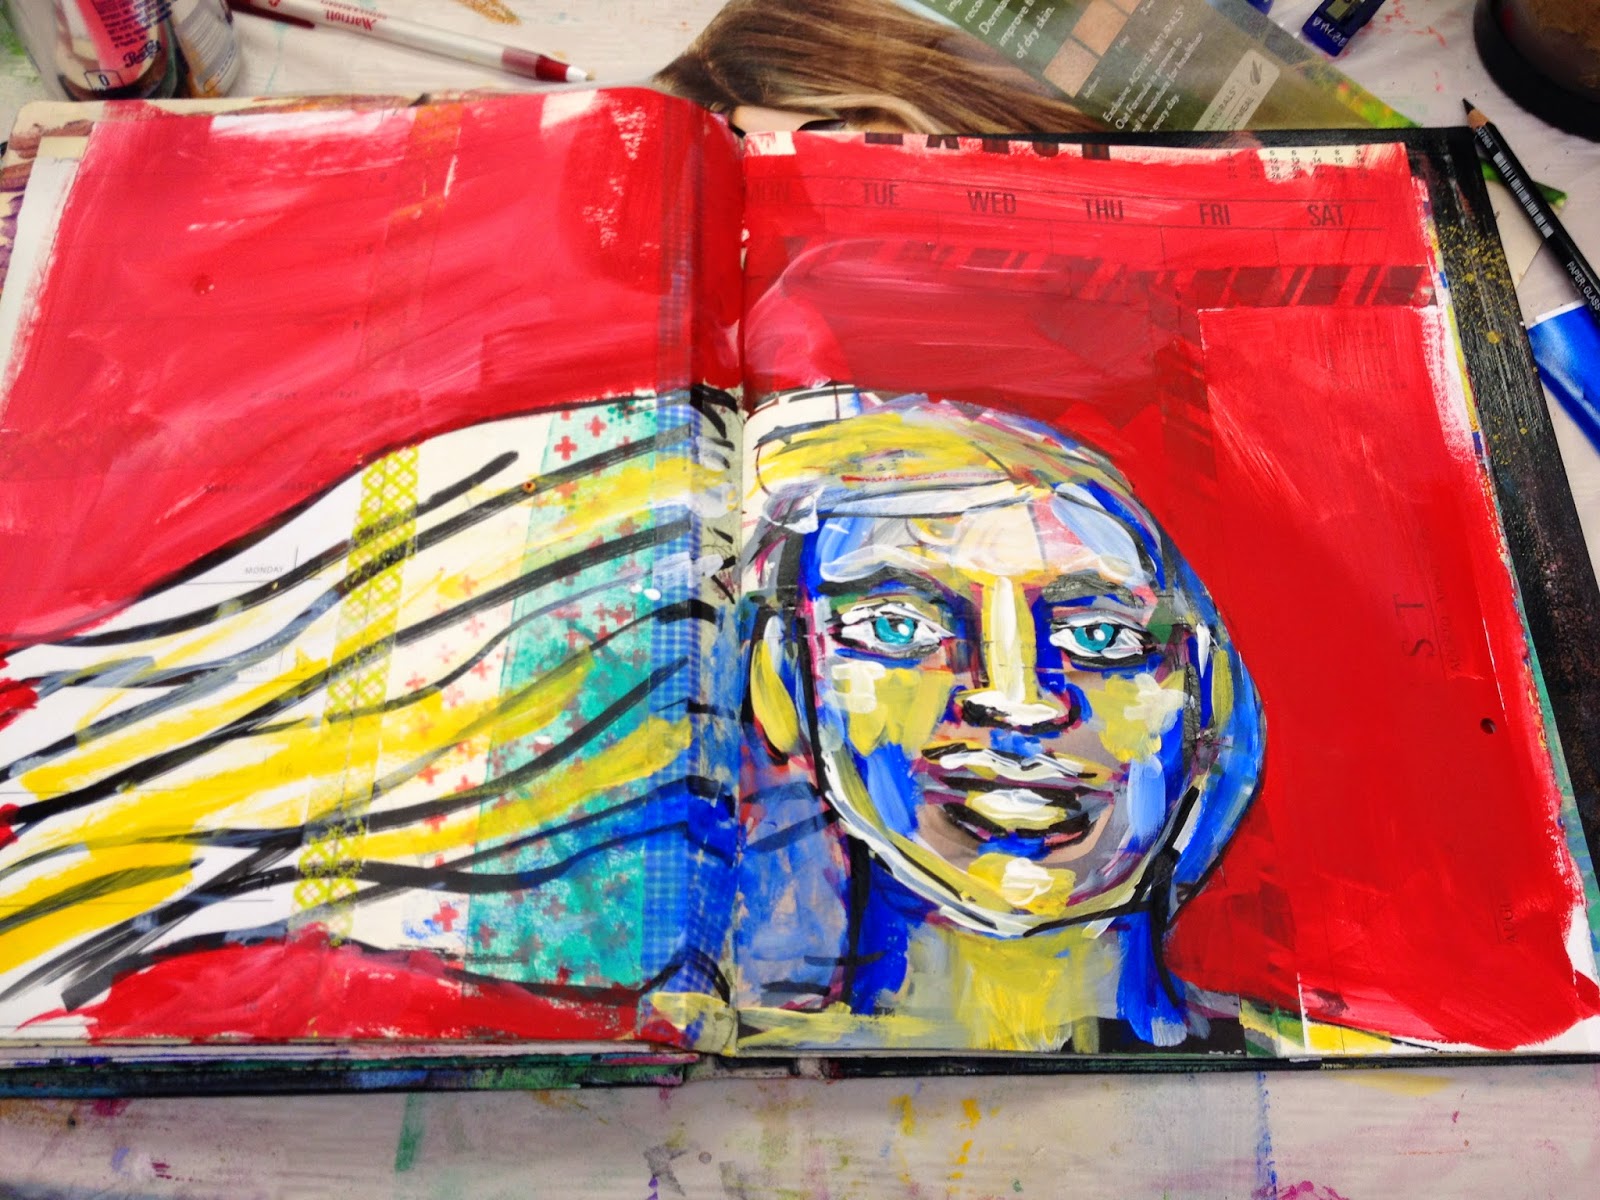
What I really loved is how we got to play in Dina's class, but we also had a goal in mind.  She had us create two journal pages, based on a formula. The pages incorporated the layered page we made, and it all came together by the end of the class. I had two completed pages and that made me sooooooo happy. This is where she soared as a teacher, in my opinion. I've taken classes with teachers who just let you play with techniques or supplies. However, with these type of classes I later feel as if I didn't get my "money's worth" out of them. Not in this case.  

Plus, we got to try out Dina's paint colors which are beautiful. They are colors that work really well together and are not the same old basics. Dina had some cool tools as well, including a needle-tip bottle for painting extremely thin lines.   

Here are some pictures from the class. I apologize to Dina, I was snapping when I could as my back didn't allow for carefully executed shots. She's a lot of fun, but you also really learn a lot.


I managed to get Lisa in the picture below, she's on the right!!


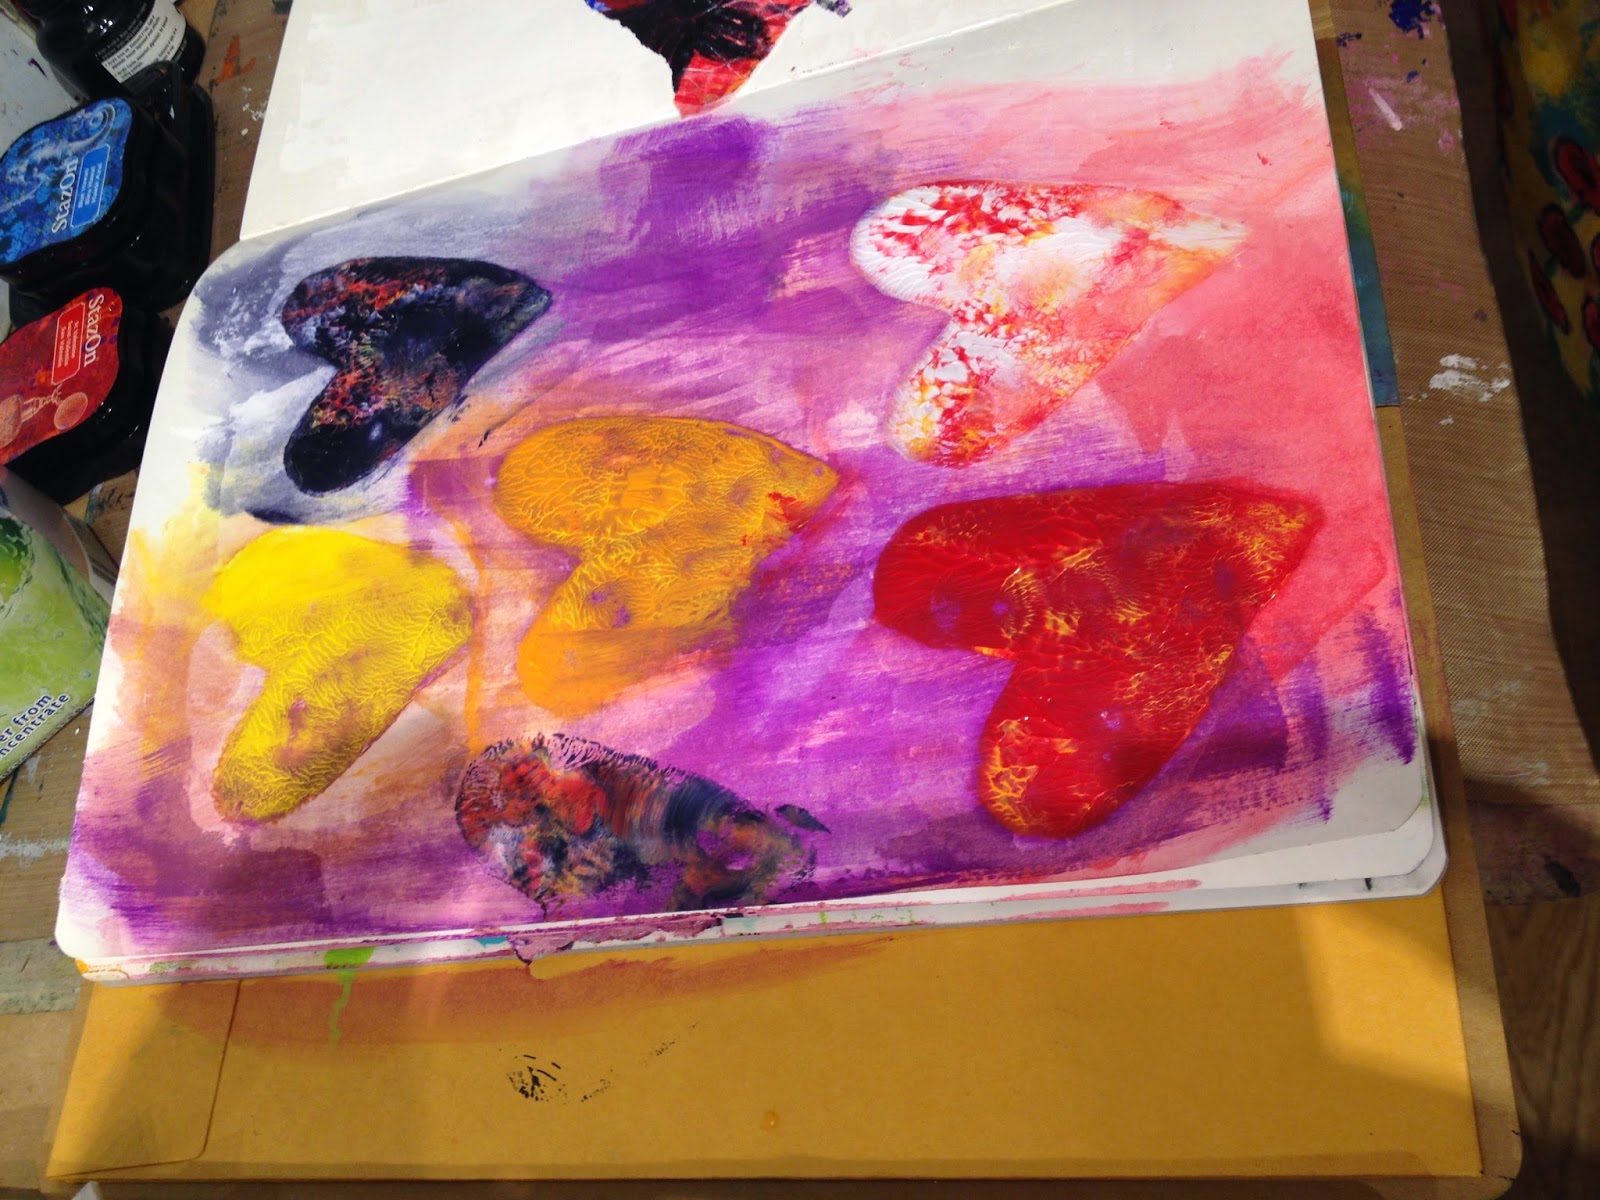
The 2nd class was Delightful Painted Deli paper. I had to take a pic of this page. I just had to copy the teacher and make a page using the heart mask. This technique is SO fun.  I was totally nutty about cleaning and Lisa and Laurie both appropriately scolded me into sanity. The whole point is to be messy, use all the paint and don't waste anything. I'll have to add a picture of the page Lisa started in my journal, using the leftovers from the heart mask I had been about to wipe off.


I'll have more to say about this later, but I was so happy I took this class. We had a smaller group and Laurie finally got some much needed elbow room, when some people from the first class left for the day.

I know that using deli paper with the Gelli plate is da-bomb but I never had thought about using deli paper to create backgrounds. Dina told us that she and a friend will get together and create 25 at a time, and use them for projects. It's such a great idea.  

My favorite technique is using stencils to do rubbings with the deli paper. I'll have to do some samples and talk more about that later.


Below it's Brenda, Dina and me!


Our class pack, Laurie, Lisa, me and Brenda! What  great way to spend the day.  


Okay, well I had better wrap up this post because it's a long one. I plan to do some show-and-tell and show off my journal pages.  

toodles for now . . . 

Monday, September 22, 2014

Gelli plate site, book and so much more

I'm nuts about the gelli plate.  I've been able to make some amazing backgrounds and ergo, fun cards with this art tool.  I've introduced it to my clever and artistic nephews as well, and they seemed to enjoy it as much as I did.  In pursuit of some new creative fodder, I stumbled upon this site which has some intriguing ideas. I am now totally inspired.  

createmixedmedia.com/make/gelli-plate-printing-extras-part-1

These techniques were shared by the author of a book called Gelli Plate Printing - Joan Bess.  Now, being that the world of mixed media is a much smaller world than I would have ever believed, I just so happen to have been attending an amazing class by Dina Wakley (yes, I am a name dropper - unapologetic one at that) hosted by the Ink Pad NYC and they had a wonderful little mini mall set up in the back of the classroom.  There it was, the very book I had just seen online.  

Being that there's no greater pairing (the exception, chocolate and peanut butter) than attending an art class accompanied by shopping, I had to buy it.  Now I cannot wait to delve.

Joan Bess book Gelli Plate Printing


Just the cover art along is so intriguing. 

So please, stay tuned as I intend to employ the ideas from the book for myself. While I was attending the class I heard rave reviews about this book, so if you are a book junkie like me and you have a Gelli plate, you probably don't need much encouragement to check it out.

I'm working on some posts about the Dina classes, which were really amazing.  My head is brimming.  I have loads to share, so stay tuned.

Monday, September 1, 2014

Canvas artwork

Hi all!  Well I have been working on canvas. My friend Dottie took a class at CREATE, NJ and she was showing us her works, which are currently on display in her school. So she gave me the basics and I created one. We had fun doing an online class of sorts, conferencing so we could work on them together.  

So here is my first attempt.  I found it interesting and it is a many-day process. First you prime the canvas with gesso. Then use papers to build your house or structure. You use gel medium to adhere the paper to the canvas.  Next paint with one color. I used red acrylic and watered it down a bit. I also added some black to differentiate the roof. 

When the paint is dry, apply a generous layer of gel medium. One thing is that I ran out of my Golden soft matte gel medium. So I purchased Liquitex (no mention of anything regarding soft, etc.) but just said matte medium. What I learned is that Liquitex is extremely white, which makes the next step difficult. Since the Golden is more translucent, I much prefer the Golden, which was also thicker and easier to layer. 

Once you have a layer that's wet, use a chop stick to outline the houses, or areas on the canvas you want to highlight. I also created clouds, since there was such a large open area int the sky. You could put birds, a sun, etc.  


Any areas in dark brown were drawn out/scraped with the chopstick. I did windows, roof lines, etc.

You have to allow a long time for the gel medium to dry. Once it does, use a contrasting color paint and fill in the scratched out areas. In the case of the clouds, you can paint directly on top of the gel medium. The last step, is the fun stuff embellishing. I added beads, metal pieces, a key, a paper dye-cut bird (put a bird on it) and a watch face. 

I love how it turned out and I am working on a few more which will be gifts for friends. So I can't let you peek yet. 

It's been a relaxing and creative weekend.  I am really enjoying myself.  I have to say that I feel I accomplished a lot and I was listening to Coldplay's latest Ghost Stories. It's a beautiful album and really is perfect music to create by. It's dreamy, and so ethereal.  

Do something creative every day!!

Monday, August 25, 2014

Wow, what happened to August?


Okay, I am very excited to be back in the studio creating. There's no question that the creative tool of the moment is the stencil. I picked up so many at the Artists' Faire at CREATE NJ and they are really a joy to use. 

I recieved a birthday card incorporating Dina Wakely stamps and techniques, so after watching YouTube videos to inspire me, I got to work. Here is my latest page. I played around with a technique involving paint, stencils and baby wipes. It's really fun. I finished it off with some of my fun face stamps, since I haven't picked up any of Dina's stamps yet. 


The best thing is to just dive in and try her techniques. So I first laid down a gesso layer, using an old hotel key card. It is the best to get a smooth, thin layer. Then painted and used stencils and baby wipes to remove paint. Then added more paint and using a different stencil, the mask, removed color everywhere but the masked image (blue figure on lower right). So clever. 

I have more to do on this spread, but it's a start. I used a water brush filled with ink for the brushed black images. Finally, I made use of one of my birthday gifts, an Ohto Fude roller ball 1.5 mm black pen. It's a big smooth rollerball pen and it writes on anything, painted pages, etc. I am so hooked I ordered more at Jet Pens today. Try them, you will love 'em. 

Well, it's a start. I have loads to share including my art retreat with my nephew Brandon, we created a pile of cool papers with stencils and spray inks. Then there's my "online" class with Dottie and Brenda making cool canvas art. Can't wait to show you more. Later!

Tuesday, July 29, 2014

Journal pages, finally!

So I finally got around to playing with my journal and worked on a couple pages.  I just love the stencils, they are so fun.  I used this Julie Fei-Fan Balzer stencil and first painted white on black on the left side of the journal spread.  When it was dry, I used the stencil over that area and applied four different colors of dye inks over the white paint with the Tim Holtz applicators. Then I took the stencil that still had the ink on it, spritzed it with water and burnished it on a piece of white paper while it was still wet. Why waste the ink, right?  That left me with a mirror image of the stencil on white paper, which I glued down in my journal.  

The top border of the page below, and the borders on the 2nd spread are a wide-size washi tape.


For this next page I painted the background with acrylic paint. Then I used some fiber paste with my stencils, let it dry and sanded the area lightly. I stamped the skulls and colored them with Sakura Souffle pens.  These are fun because when they dry the ink becomes more opaque and the inked surface is raised, like a candy shell. These pens are best used on surfaces that are coated, and not absorbent. Anything plastic is the best, and that's dried acrylic paint essentially, right?


I've been working a little at a time on the pages, each evening, when I can.  It's relaxing.

Friday, July 25, 2014

Like a kid playing with the box . . .

Remember when you were a kid and got presents, and you were more interested in the box and packaging, than the gift?  I don't remember it, but know it happened because it's memorialized in photos.  The occasions took place when I was very small, and I'm guessing it happened for you as well.  We were toddling around and had the spirit of explorers, unending imaginations and we were fearless.  Well, I am living that child-like experience after opening gifts from a dear friend recently. 

Brenda is a fearless artist. She creates amazing work.  She loves color, patterns and she's great at collage.  When we get together to create art, she's the one that creates something while I'm still trying to clear an open spot on my desk.

These are envelopes she made for me and honestly, I don't want to open these gifts.  They are so beautiful.  She's also a great recycler and she can use and reuse items she finds and make them amazing. 

So, before I break into these presents, I had to post some pictures.  Some of her envelopes are hand-made.  They are beautifully collaged.  Then there's the ribbons and then the beautiful tags.  Brenda is no fan of naked envelopes.  For that matter, she'll transform boxes as well.  She's been known to turn boxes inside out and decorate them before using them to mail a gift.

I'm inspired - how about you?


Monday, July 21, 2014

Class from CREATE NJ on Saturday, 7/12 Faces class


This is from my day 2, Saturday at CREATE NJ.  The class is Explore Faces class with Julie Fei-Fan Balzer.  After seeing her in the Creative Jumpstart 2014 classes earlier in the year I checked out her web site and watched a bunch of her demos. I'm a big fan of her work.  

So many interesting concepts in her class.  I am so thrilled I took this class.  What I thought was interesting is that it takes very little accuracy in a drawing for people to recognize an image as a face.


The formula she provided is really helpful, and again, since we're not going for photo-realism here, it's very open and playful. This is so conducive to learning because you don't get hung up on anything, you can enjoy the learning process and get out of your own way.

Check out her blog:
Julie Fei-Fan Balzer's blog

This is one of the images from a magazine that I used:

BEFORE:


AFTER:


We did quite a few exercises to break us out of the fear of faces.  I think it worked because I now have none.  One amazing part of the class is that even though constructing a face is a fairly simple formula, we came up with so many different faces.  

Also, the faces that we constructed using face "parts" from different ads (where the parts didn't "match") had more character, and were more interesting than the ones solely based on a the basic formula. This lesson is so liberating because it means you really can have fun and toss out the idea of perfect. It's not what we're going for, and that makes me happy. Just like any project where exact measurements are not involved, it takes the pressure off and allows you to have fun.

I'm so excited to get home, create and play in my new journal. To me, that's the mark of a good teacher!!  I got a picture with Julie:


Here's the picture Julie emailed me of our whole class! 


I'm overwhelmed with ideas, so the toughest part is getting down to work.  I first plan to paint and prep some journal pages and let them dry.  My pal Brenda was talking about looking at so many web sites and getting inspired, but then you just sit at your desk and don't know where to start.  So, what I plan to do is find a demo and use it as inspiration for a journal page.  You have to start somewhere and then after you've begun, it will doubtless make it easier.

Theme wise, I keep getting inspiration when I listen to my favorite songs.  Lyrics mesh with imagery.  So I want to create a journal based on my favorite songs.    

Well, hope to share more this week.   

Saturday, July 19, 2014

CREATE NJ July 2014

Okay, so it's time to start talking about the cool things I did at the CREATE NJ retreat.  On Friday, 7/11 my fellow retreater, dear friend and all-around fun traveling companion Dottie and I departed at 6am from my house to drive to Somerset NJ, to the Double Tree hotel. Just a note that it was the 2nd day in a row that I had to get up at 5am, yikes. No issues on our trip due to traffic, but we had an inept gas station attendant manage to overfill and flood my tank.  Then he tried to blame my car or tank, and then me.  Certainly I am responsible even though in NJ gas stations are full-service.  Anyway, Dottie has one extra story because this same dude tried to rob her of her change, then she was robbed again.  Second time by a Dunkin employee of breakfast, after he gave her a sandwich containing an allergy-inducing ingredient. We overcame these significant obstacles and marshaled on to our destination. 

We lug our considerable stash of supplies to the registration desk and take a look at some of the amazing samples for the classes.  Time to check in and don our name tags!  We are both so excited and we part ways to get set-up in our classrooms.

I'm so excited to get a great seat, plenty of room and my own outlet.  Just to have a spot for my large rolling suitcase full or art supplies, makes me so happy.  Let me tell you that I brought: acrylic paints, brushes, canvases, apron, water jar, magazines, pens, gesso, gel medium, heat gun, baby wipes, paper towels, art journal and a brayer.  I'm CERTAIN there's more I haven't mentioned, but I was proud that I was fairly self contained and essentially self-sufficient.

Our teacher was Nathalie Kalbach and the class was It's All About Layers. You can check out pictures at her web site (there are a couple with me totally engrossed in my own creative world):

Nathalie's studio and post from the CREATE retreat

I did take a couple pictures from Nathalie's journal:


We used images from magazines and got to play with her stencils, Liquitex paint pens and other supplies.  My biggest issue was that I didn't bring a good art journal with me.  I grabbed one that I had lying around.  The paper was not white, and the paper was not even low quality, it was horrid quality.  I did have fun learning techniques and I'll post some pictures of my pages in the coming days.

The class really flew by and I might have stayed all night if not for the fact that the AC in the classroom stopped working after lunch.  By the time 4pm rolled around, I was ready to move on and check in the room. The best part about checking in at a Double Tree?  The chocolate chip cookies.  I met someone very nice in the lobby, her name was Terri and she is an art teacher.  We struck up a conversation over one of those cookies.  Then I had to go see what Dottie had created, as her class had a gallery set up in their classroom.

One thing I want to say about this CREATE retreat is that I really enjoyed the artists who sat around me.  Everyone was very generous and quite friendly.  I got to meet Maura, who sat next to me in the class.  Turns out our rooms were very close and we struck up a plan to meet for dinner.  We ate a pre and post Artists' Faire dinner with Maura and Penny (they ate before and Dottie and I ate after).  It was really fun meeting both of them.

After we all agreed we would win something at the Artists' Faire drawing, we got to shopping. Again, walking around I found everyone to be so friendly and courteous.  If you've been to these type of events, conventions, etc. you know how nasty people can get when they are shopping.  This experience was nothing like I've seen.  Loads of smiles and lots of patience, it was a very pleasant experience.  There were a perfect number of vendors with loads of great merch.  I bought a load of new stencils, and we had to work together to peruse them.  So excited to have found some of the Dylusions Art Journals from Ranger. I got one in two sizes, much better than my bogus journal I used in the class. Then the awesomeness of the day exponentially increased when I won a drawing!!  I won a $30 stamp set!  I love the images, they are so my style.  Here's a link to the artist's Pinterest site where you can see her images.  Artsy chick indeed!

kecia-deveney stamp set

I have to note that I won a bet with new friends Maura and Penny after I brazenly went to the desk at the Double Tree and kindly requested an on-demand chocolate chip cookie.  They didn't believe I'd get one, and I did.  It was warm, and gone in 60 seconds.

So that pretty much wraps up Friday.  The day, and evening went fast.  We did a Facetime with our pal Brenda, where we did show and tell from the day.  It was then time for some sleep.  Hard to believe taking art classes can make you so tired, but it did for me.  

I'll have to post later about my class on Saturday with Julie Fei-Fan! My creative juices are FLOWING now!!!!!

Tuesday, July 15, 2014

A little bird told me

This is a bit of an inside joke, but if you watch Portlandia, you'll get it. I found this cute guy in the dollar bin at the CREATE Vendor Faire and I had to buy it. The stamp is from Impress Rubber Stamps and says it all. 

Just love it!


Saturday, July 12, 2014

CREATE Retreat New Jersey 2014

Ok, where did the months go?  I am back and so excited after just returning home from the CREATE retreat in New Jersey. 

I am sharing some pictures from my class Explore Faces with Julie Fei-Fan Balzer. 

More to come another day, but we had fun and made some new friends. Maura in my first class and Penny in today's!  I sure enjoyed show-and-tell after the Vendor Faire!  Everyone was very nice and people were very positive. There was loads of sharing, of both ideas and supplies. 

I recommend it highly. One lessons learned is that being creative can be exhausting. Don't schedule too many classes. Those taking evening classes as well as daytime classes were very tired. Next year it would be great to plan an extra day at the end to relax and create together. 


I am tired, but inspired!

Monday, May 12, 2014

Dimensional art


This card features black paste which I applied over a stencil of a leaf. I then stamped an inspirational sentiment and embellished with my favorite white gel pen, the Uniball. 


Sunday, May 11, 2014

More of my cards

So after a huge hiatus, I am back to show my cards from Marjie's class. This one has a heart using a stencil and multi-medium matte which leaves a raised surface. I used wire and brads to adorn the paste heart. 

The final touch is the Dymo label. I love how it turned out. 


Saturday, May 10, 2014

Under the sea tangling

I am so excited to be visiting my best friend Jo-Ellen in Florida. She lives so close to the beach you can hear it when you go outside. After spending some time walking on the beach, on a perfect day, I just had to post some artwork she created at her annual Zentangle Retreat to Paradise, which she hosts. The Zentangle patterns she used are inspired by sea life. I just love what she's created. This work isn't finished, but it inspired me to start working on my own.

This is Jo-Ellen's artwork and the Zentangle patterns she used are: Moooka, Flux & Orbs, Poke Root, Poke Leaf, Cat-kin, Sanibelle and Bumper & Jersey Cheer, Aquafleur and Antidots.  There are a few more, I will have to update this post later. 


Wednesday, April 2, 2014

Cool technique

I found this card and had to capture a picture to remember this fun technique.  

It's pretty basic, take brightly colored inks, and apply harmonious colors to make a bright background.  Then choose a stamp that has a lot of open areas, and areas that allow for small embellishment.  Once you stamp the images randomly, you use a white gel pen to add highlights. 

The best white gel pen is the Uniball, which I am able to get at Paper Source stores.  It is very opaque and really pops.

This one is all about the colors and the stamp you choose.  


Tuesday, April 1, 2014

Clever art installation at the Kimmel center

Dan and I went to see a show a couple weeks ago in center city Philadelphia.  The show Cirque Eloize Cirkopolis was beautiful. I'm not adept at selecting words to describe what we saw.  If you want to have a tiny taste, visit this site and watch particularly at 2:30 in the video a dancer master a hoop. I couldn't take my eyes off it.

http://www.cirque-eloize.com/en/shows/cirkopolis

After we parked, we walked through the Kimmel Center to reach the theater and happened upon this very cool art installation. It consists of busts of famous Classical composers, made from books.


I love that artists have found ways to use old books, that otherwise might spend an eternity on a shelf. Just like the art of altering books, I find this so clever and fascinating.  It's really well done.  From the front, I had no idea what material had been used.  I initially thought some type of wood had been "laminated" and glued together, after being covered with gesso or white-washed.

The link below takes you to see more samples of these clever works. 


http://kimmelcenter.tumblr.com/post/78442359615/innovative-art-installation-a-new-look-for